The best adhesive for shower corner shelf is silicone caulk. It is waterproof and can withstand high temperatures, making it ideal for use in the shower. Silicone caulk is also flexible, so it can conform to the shape of the shelf and create a tight seal.
If you’re looking for the best adhesive for a shower corner shelf, we’ve got you covered. We’ve rounded up the best options on the market, so all you have to do is choose the one that best suits your needs. Here are our top picks:
1. Loctite Power Grab All-Purpose Adhesive: This all-purpose adhesive is ideal for attaching shower shelves to tile or other smooth surfaces. It’s waterproof and durable, so it can withstand exposure to moisture and humidity. Plus, it’s easy to apply and dries clear for a neat finish.
2. Gorilla Super Glue Gel: This gel formula is perfect for bonding uneven or porous surfaces like tile. It’s also resistant to water, heat, and cold temperatures, making it ideal for use in the shower. And because it’s super strong, it can hold up to heavy items like shampoo bottles or towels.
3. 3M Scotch-Weld Epoxy Adhesive DP460NS: This epoxy adhesive is great for bonding metal, glass, ceramic, and plastic surfaces together. It sets quickly and forms a permanent bond that resist impacts and extreme temperatures. Plus, it can be used in wet environments like showers without losing its strength or adhesion properties.
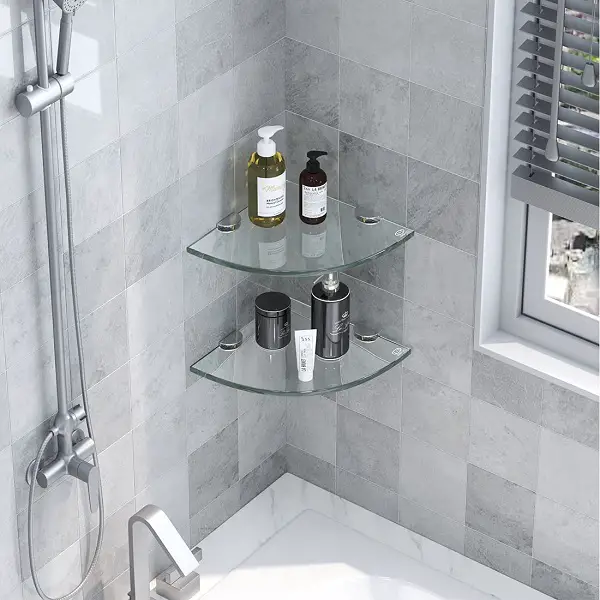
Adhesive Shower Corner Shelf for Bathroom&Kitchen, No Drilling Required
How Do You Glue a Corner Shower Shelf?
When it comes to corner shower shelves, the best way to adhere them is with glue. This will ensure a secure and lasting hold. Below are step-by-step instructions on how to glue a corner shower shelf.
1) Begin by cleaning the area where the shelf will be glued. Use a mild cleanser and a damp cloth to remove any soap scum, dirt or debris. Rinse well and allow the area to dry completely.
2) Apply adhesive to both the back of the shelf and the wall surface. For best results, use a construction adhesive that is specifically designed for showers and wet areas.3) Press the shelf firmly into place on the wall and hold for several seconds until the adhesive sets.
If needed, use clamps or weights to keep the shelf in place while the glue dries.4) Allow 24 hours for the adhesive to cure before using your new shower shelf.
Do Adhesive Shower Shelves Work?
If you are looking for a way to keep your shower organized and clean, then you may be wondering if adhesive shower shelves work. The answer is yes! Adhesive shower shelves are a great way to keep your shampoo, soap, and other bathroom essentials within reach while freeing up space in your shower.
Plus, they are easy to install and can be found at most home improvement stores. Here’s what you need to know about adhesive shower shelves:How do adhesive shower shelves work?
Adhesive shower shelves work by affixing to the wall of your shower using strong adhesives. Most adhesive shelves come with brackets that help support the shelf and prevent it from falling off the wall. Once installed, you can use these shelves to store shampoo, soap, razors, and other bathroom essentials.
Plus, many adhesive shelves come with built-in towel racks or hooks that provide additional storage options for your bathroom.What are the benefits of using adhesive shower shelves?There are several benefits of using adhesive shower shelves in your bathroom.
First, they free up space in your shower by providing a place to store all of your bathroom essentials. This can make it easier to keep your showers clean since there will be less clutter on the floor or ledges. Additionally, adhesive shelves are easy to install and can usually be found at most home improvement stores.
Finally, many models come with built-in towel racks or hooks which provide additional storage options for towels and robes.
How Do You Install Corner Tile Shelves in a Shower?
Installing corner tile shelves in a shower is a great way to add storage and easy access to your bath products. Here are the steps to install corner tile shelves in a shower:1. Clean the wall surface where the shelf will be installed with mild soap and water.
Make sure the area is completely dry before proceeding.2. Apply construction adhesive to the back of the shelf brackets using a putty knife. Press the brackets firmly into place on the desired location on the wall.
Allow the adhesive to dry for at least 24 hours before proceeding.3. Measure and mark tiles for cutting as needed around each bracket using a pencil and level. Place masking tape over the areas that will be cut to avoid chips or cracks while cutting.
Use a wet saw to make clean, precise cuts along your lines. Remove any sharp edges with a file or sandpaper if necessary.4 Set each tile in place around the bracket, starting at the bottom and working up, applying mortar as needed (following manufacturer’s instructions).
Wipe away any excess mortar with a damp sponge before it dries completely . Once all tiles are set, allow mortar to cure for at least 24 hours before grouting .5 Mix grout according to manufacturer’s instructions then apply it evenly into all joints between tiles using a rubber float held at about a 45 degree angle .
Work grout into joints until they are filled then wipe away any excess with a damp sponge . Allow grout to cure for at least 24 hours before using shelves .
How Do You Attach a Shelf to an Existing Shower?
If you’re looking to add a shelf to your shower, there are a few things you’ll need to take into account. First, you’ll need to decide what kind of shelf you want. There are many different types of shelves that can be attached to showers, so it’s important to choose one that will fit your needs.
Do you want a shelf for shampoo and soap? A place to put your razor and shaving cream? Or maybe just a spot to rest your loofah while you’re showering?
Once you’ve decided on the type of shelf you want, the next step is attaching it to your shower.There are two main ways to attach a shelf to a shower: using adhesive or drilling into the tile. Adhesive is the easier option and doesn’t require any special tools, but it isn’t as secure as drilling into the tile.
If you choose this method, simply clean the area where you want to attach the shelf and then apply the adhesive according to the manufacturer’s instructions. Let it dry for at least 24 hours before putting anything on the shelf. Drilling into tile requires more effort but results in a much more secure attachment.
Start by marking where you want the holes for screws using a pencil and level. Then, use an appropriate-sized drill bit (diamond tips work best)to create pilot holes in the tile.
Credit: www.ebay.com
Installing Shower Shelf on Already Tiled Wall
If you’re looking to add a shower shelf to your already tiled wall, there are a few things you need to keep in mind. First, make sure that the tile is firmly attached to the wall and that there is no grout missing or cracked. If everything looks good, proceed with these instructions:
1. Using a drill, create pilot holes in the tile where you want your shelf brackets to go. Be careful not to crack the tile!2. Insert plastic anchors into the pilot holes.
3. Attach your shower shelf brackets to the anchors using screws. Make sure they’re nice and tight so the shelf doesn’t wobble around when you use it.4. Place your shower shelf on top of the brackets and voila!
You now have an extra spot for all of your toiletries while you shower.
Conclusion
If you’re looking for the best adhesive for shower corner shelves, look no further than Loctite Power Grab All-Purpose Adhesive. This product provides a strong, waterproof bond that can hold up to 15 pounds, making it perfect for holding heavier items on your shower shelf. Plus, it’s easy to use and cleanup is a breeze – just be sure to follow the directions on the package.