
When drywall gets wet, it can start to degrade and break down. This can cause serious problems like mold and mildew growth, as well as structural issues. If you have a shower that is next to drywall, you need to make sure that the area stays dry.
You can do this by installing a waterproof barrier or sealant around the shower. You should also make sure that the ventilation in the bathroom is adequate so that any moisture is quickly removed from the air.
How to Waterproof Bathtub Drywall — by Home Repair Tutor
If you’ve ever stepped into a shower and felt the drywall next to it getting wet, you’re not alone. This is a common problem in bathrooms, and it can be caused by a few different things.One possibility is that your shower isn’t properly sealed.
Over time, caulk or grout can degrade, allowing water to seep through and get the drywall wet. If this is the case, you’ll need to remove the old sealant and apply fresh caulk or grout around the edges of your shower.Another possibility is that your bathroom ventilation isn’t adequate.
If there’s no way for the moist air to escape, it will eventually cause the drywall to get wet. The solution here is to install an exhaust fan in your bathroom so that the air can circulate properly.Finally, it’s also possible that your home’s plumbing is to blame.
If there are any leaks in the pipes leading to or from your shower, water could be seeping out and getting the drywall wet. This is a more serious problem that will require professional help to fix.If you’re noticing that the drywall next to your shower is getting wet, don’t ignore it.
While it may not seem like a big deal at first, left unchecked it can lead to bigger problems down the road. Be sure to take care of this issue as soon as possible so that your bathroom stays looking its best!
How to Fix Drywall Next to Shower
If you have drywall that is next to your shower, you may be wondering how to fix it. There are a few things that you can do in order to fix this problem. First, you will want to make sure that the area is completely dry.
If there is any moisture at all, it will only make the problem worse. Once the area is dry, you can then begin to repair the damage.One way to repair drywall next to shower is by using a patching compound.
This can be found at most hardware stores and will come with instructions on how to use it. You will need to apply the patching compound over the hole or crack in the drywall and then allow it to dry completely. Once it is dry, you can then sand down the area until it is smooth.
Another option for repairing drywall next to shower is by using a filler strip. This option works well if there are small cracks or holes in the drywall. To use this method, simply cut a strip of wood that is slightly longer than the hole or crack that you are trying to fill.
Then, apply some construction adhesive onto one side of the strip and press it into place over the hole or crack. Allow the adhesive to dry completely before proceeding with any other repairs.
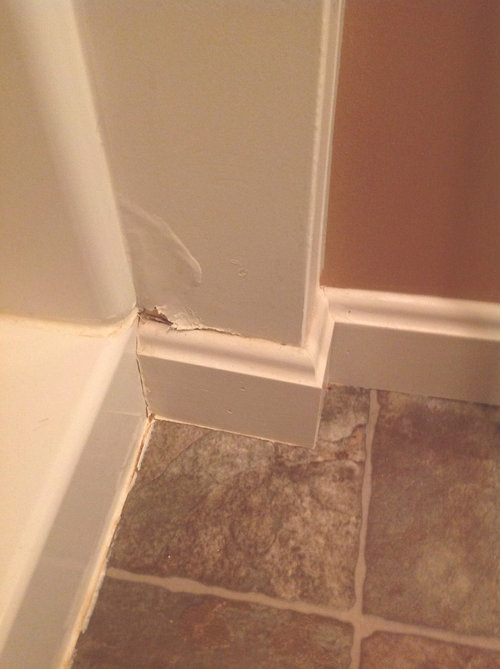
Damp Patch on Wall Next to Shower
If you’re noticing a damp patch on your wall next to your shower, it’s important to take action quickly to prevent further damage. There are a few possible causes of this problem, so it’s important to diagnose the issue correctly before proceeding with repairs.One possibility is that the waterproofing around your shower is failing.
This could be due to age or poor installation, and it can allow water to seep behind the tiles and into the wall cavity. If this is the case, you’ll need to strip the tiles and waterproofing from the affected area and start again.Another possibility is that there’s a leak in one of the pipes leading to or from your shower.
This type of leak can be difficult to spot, but if you suspect it may be the cause of your damp patch, you should call in a professional plumber for help.Once you’ve identified the cause of the dampness, you can proceed with making repairs and taking steps to prevent future problems. For example, if you have an old shower with outdated waterproofing, consider updating it with modern materials that will better protect against water damage.
And if you discover a pipe leak, make sure it’s repaired properly so that water doesn’t continue seeping into your walls.
Shower Splash Guard
A shower splash guard is a must-have accessory for anyone who wants to keep their bathroom clean and dry. Splash guards are placed at the bottom of the shower door or stall, and they help to prevent water from escaping the shower area. Most splash guards are made from clear plastic or vinyl, and they can be easily wiped clean with a damp cloth.
Some models even have suction cups that help to keep them in place.
Drywall Bubbling near Shower
If you’ve noticed bubbling drywall near your shower, it’s important to take action right away in order to prevent further damage. The good news is that there are a few different ways to fix this problem.One option is to remove the affected drywall and replace it with new material.
This is definitely the most thorough way to fix the issue, but it can be quite messy and time-consuming.Another option is to use a special primer paint that’s designed for bathrooms. This will help seal up the bubbling area and prevent moisture from seeping in.
Finally, you can also try using caulk or another type of sealant around the edges of the shower. This won’t completely solve the problem, but it can help slow down the progression of damage.
How to Repair Damaged Bathroom Walls
If your bathroom walls have seen better days, don’t despair! With a little elbow grease and the right tools, you can repair damage and get them looking like new again. Here’s how:
Start by assessing the damage. Is it just surface scratches and scuffs, or are there deeper gouges? If it’s the latter, you’ll need to use spackle or joint compound to fill in the holes before painting.
Once you’ve repaired any major damage, give the walls a good cleaning with soap and water (or a mild all-purpose cleaner). Then, using sandpaper, smooth out any remaining imperfections. Wipe away any dust with a damp cloth.
Now you’re ready to paint! Choose a color that will brighten up the space and make it feel fresh and new. Use a primer if necessary, then apply paint in even strokes.
Let dry completely before using the bathroom again.With these simple steps, you can easily repair damaged bathroom walls – no professional help needed!
Credit: www.houzz.com
How Do I Fix Water Damaged Drywall Next to Shower?
If you have water damage to your drywall next to your shower, there are a few things you can do to fix it. First, if the drywall is only slightly damp, you can try using a hairdryer on the low setting to dry it out. If the drywall is more than slightly damp, you will need to remove it and replace it with new drywall.
To remove the old drywall, use a utility knife to score around the edges of the damaged section. Then, use a putty knife or pry bar to remove the section of drywall. Once the old drywall is removed, measure and cut new piece of drywall to fit in its place.
Secure the new piece of dry wall in place with screws or nails and then tape over all of the seams with mesh tape. Finally, apply joint compound over all of the seams and allow it to dry before painting or texturing as desired.
How Do You Waterproof Drywall Next to a Bathtub?
If you’re planning to waterproof drywall next to a bathtub, there are a few things you’ll need to do in order to ensure a successful project. First, you’ll need to apply a layer of moisture-resistant board or paperbacked gypsum sheathing to the wall. Next, you’ll need to install an air and vapor barrier over the sheathing and seal all seams and joints with tape or caulk.
Finally, you’ll need to apply a waterproof coating or membrane over the entire surface. By following these steps, you can rest assured that your drywall will be protected from water damage.
How Do You Seal Drywall around a Shower?
If you’re planning to tile your shower, you’ll need to seal the drywall around it first. Here’s how to do it:1. Start by applying a layer of waterproofing membrane over the entire shower area, including the walls and ceiling.
This will help keep the drywall from getting damaged by moisture.2. Next, apply a layer of self-leveling compound to the seams between the sheets of drywall. This will help create a smooth surface for tiling.
3. Once the self-leveling compound is dry, apply a bead of silicone caulk around the perimeter of the shower area. This will help create a watertight seal.4. Finally, apply a layer of tiles to your desired design using thinset mortar or another adhesive specifically designed for use in wet areas.
Why is My Bathroom Wall Getting Wet from Shower?
There are a few possible explanations for why your bathroom wall is getting wet from shower. One possibility is that the shower head or plumbing fixtures are not installed properly, and water is leaking out from behind the wall. Another possibility is that the caulking or sealant around the shower enclosure is not intact, and water is seeping through cracks or gaps.
If you have a steam shower, it’s also possible that condensation is building up on the walls and causing them to become wet.If you’re not sure what’s causing the problem, it’s best to call a professional plumber or contractor to take a look. They will be able to diagnose the issue and recommend a course of action to fix it.
In some cases, it may be something as simple as re-caulking the shower enclosure. In other cases, more extensive work may be required, such as replacing faulty plumbing fixtures or repairing leaks behind the wall.

- UPGRADE PACKAGE WITH TOOLS NEEDED – This wall hole patch kit includes: 1 Repair Putty(8.5oz), 2pcs 2″+1pcs 4″ aluminum repair patch and 2pcs scrapers+2pcs sandpaper , all tools needed have been ready for you.
- SAVE YOUR DAMAGED WALL – No shrinking or cracking, stick on the wall firmly, not easy to fall off from the wall. The paste is High density which will prevent the wall from being alkalized, giving your wall a long time of protection. Permanently stops and prevents water leaks in concrete cracks.
- EASY TO APPLY AND SAND – Half Fluid paste, pre-mixed, and simply apply to anywhere needed. You can handle the repair job with the wall repair patch kit. Please gently shake the bottle before use to better mix the content inside and wear gloves when using it.
- FREE OF FORMALDEHYDE – Free of harmful substances such as formaldehyde, harmless to your family. Smart Choice for a Small Repair Project.
- SERVICE & WARRANTY – HOMMEE is always dedicated to providing you with quality products and services. If you have any problems with the products, please contact us for a FREE Replacement.
- ✌ Are You Tired of Wobbling Objects on the Wall? Do You Want to Keep the Cornice in Place and Repair Holes Around the Anchors? No problem! Drywall Hole Filler by X-Protector will Help You!
- ✌ Fix Holes in a Few Minutes – Hole Repair Drywall Pads are Made to Fix Holes Easily – Just Drench the Hole Repair Patch in the Water, Wrap the Anchor, and Insert It in the Hole – That’s It!
- ✌ Perfect for Any Objects – Dry Wall Hole Fixing Patches have Perfect Strength to Keep All Objects Secure: Cornices, Shelves, Pictures, etc. Drywall Pad Will Deal with Everything Easily!
- ✌ Great Pack – the Set of Drywall Anchor Patch by X-Protector Includes 10 Big & 10 Standard Patches that Will Fix All Your Holes in Dry Walls All-Around – Drench, Wrap, and Insert Wall Anchor Patch!
- ✌ Experience Absolute Contentment with Our Drywall Anchor Repair Pads! If Our Fix Holes in Walls Pads Don’t Meet Your Expectations, We’ll Refund You – Let Us Know. Make Your Purchase Confidently!

- MULTI-SIZE KIT: Wall repair patch kit contains 3pcs*2x2inch, 6pcs*4x4inch , 2pcs*6×6 inch,2pcs*8×8 inch aluminum repair patch(13pcs),repair plaster wall holes and gaps.
- DURABLE MATERIAL: Ishigao wall patching sheet is composed of release paper, aluminum lining mesh, glass fiber self-adhesive tape.
- STRONG ADHESIVE AND ADHESION: light weight and high strength for wall patching. Strong adhesion and good bonding.
- EASY TO USE: Wipe the wall clean, compare the holes, choose the right wall patch; tear off the backing paper, patch pressed into the hole, apply putty on the wall, wait 48 hours to dry, sandpaper sanding flat.
- BUY WITH CONFIDENCE : If you have any suggestions or comments, our professional team 24 hours a day to provide ready help and service!

- UPGRADE PACKAGE WITH TOOLS NEEDED – This wall hole patch kit includes: 1 Repair Putty(8.5oz), 4pcs 2″ aluminum repair patch and 2pcs scrapers+2pcs sandpaper , all tools needed have been ready for you.
- SAVE YOUR DAMAGED WALL – No shrinking or cracking, stick on the wall firmly, not easy to fall off from the wall. The paste is High density which will prevent the wall from being alkalized, giving your wall a long time of protection. Permanently stops and prevents water leaks in concrete cracks.
- EASY TO APPLY AND SAND – Half Fluid paste, pre-mixed, and simply apply to anywhere needed. You can handle the repair job with the wall repair patch kit. Please gently shake the bottle before use to better mix the content inside and wear gloves when using it.
- FREE OF FORMALDEHYDE – Free of harmful substances such as formaldehyde, harmless to your family. Smart Choice for a Small Repair Project.
- SERVICE & WARRANTY – HOMMEE is always dedicated to providing you with quality products and services. If you have any problems with the products, please contact us for a FREE Replacement or Refund the money back to you.

- 【All-In-One Drywall Patch Repair Kit】 – This drywall repair kit includes 1x 18 Oz Wall Repair Putty, 2x Self-Adhesive Mesh Patches (4-inch repair size), 2x Sandpaper, and 1x Scraper. It provides all the tools you need to repair wall surface damage efficiently, from nail holes to larger drywall cracks
- 【Waterproof and Quick-Drying】- Our repair putty, a wall mending agent, is waterproof, dries quickly, and leaves no residue for a clean, professional finish
- 【Versatile for Various Wall Issues】- Ideal for repairing various wall issues, including nail holes, cracks, chips. scratch, stains,peeled paint, and dents on the wall. The self-adhesive mesh wall patches cover up to 4-inch wall holes, adhere firmly, and are easy to sand, ensuring a smooth, professional finish
- 【Safe and Durable Formula】- The upgraded plaster wall repair kit is non-toxic (formaldehyde-free), waterproof, and crack-resistant. It ensures a smooth, streak-free finish, leaving no visible marks and providing a long-lasting repair
- 【Easy to Use for DIY Projects】- Whether you’re a DIY enthusiast or a professional, our wall repair kit simplifies the repair process, allowing you to enhance the beauty of your home with ease.
Conclusion
If your drywall is getting wet every time you shower, there are a few things you can do to fix the problem. One option is to install a waterproof barrier between the drywall and the shower. Another option is to use a dehumidifier in the bathroom to reduce the amount of moisture in the air.
If neither of these options works, you may need to replace the drywall entirely.