1. Cut the end panel skins to size, allowing for a 1/4-inch overhang on all sides.
2. Spread a thin layer of construction adhesive on the back of each end panel skin. Be sure to apply the adhesive evenly and in a continuous line from top to bottom.
3. Position the end panel skins on the cabinet ends, aligning the edges flush with the cabinet sides and front edge. Press firmly into place.
4. Use finishing nails or small brad nails to secure the end panel skins in place along the top and bottom edges only.
Space nails evenly, about 6 inches apart.
- Remove all hardware from the cabinet
- This includes any knobs, pulls, and hinges
- If the cabinet is painted, sand down the surface to provide a rough texture for the end panel skins to adhere to
- If the cabinet is unfinished, skip this step
- Cut the end panel skins to size using a saw or power tool designed for cutting laminate sheeting
- Make sure to wear protective gloves and eye gear when using power tools
- Apply construction adhesive to the back of each end panel skin, spreading it evenly with a putty knife or similar tool
- Press the end panel skins into place on the sides of the cabinet, lining up any seams as best as possible
- Use clamps or weights to hold them in place while the adhesive dries according to manufacturer’s instructions (usually 24 hours)
How To Install Skin Panels On Kitchen Cabinets
How Do You Secure a Kitchen End Panel?
When it comes to kitchen end panels, there are a few things you can do to ensure they are properly secured. First and foremost, you will want to make sure the panel is properly sized for the opening it will be filling. This means measuring the width and height of the opening before purchasing or cutting the panel to size.
Once you have the proper size panel, you can then begin securing it in place. If the panel is going into an existing cabinet, you will likely need to use screws or nails to secure it at the top and bottom. For new cabinets or installations, you may be able to use adhesive strips or other mounting hardware that comes with the panel.
Following manufacturer’s instructions carefully will ensure a secure and lasting hold.
How Do You Install Toe Kick Skin?
Installing toe kick skin is a great way to add a finishing touch to your kitchen cabinets. Here are the steps you’ll need to take to ensure a successful installation: 1. First, measure the width of your cabinet opening and cut the toe kick skin to size.
2. Next, use a sharp utility knife to score along the back of the skin where you will be making your folds. This will help create clean lines and prevent tearing.
3. Then, fold the skin over on itself so that it fits snugly against the sides of the cabinet opening and secure in place with construction adhesive or brad nails.
4. Once everything is secured, trim away any excess material with your utility knife and enjoy your new finished look!
How Do You Install Side Panels on Base Cabinets?
Assuming you’re talking about installing cabinet doors: Tools needed: drill, dowel jig, clamps, hammer, chisel
1.Start by measuring the opening of the cabinet door.
Add an extra 1/8″ to your measurements to account for any discrepancies. Cut your panels to size using a saw. If you’re working with MDF or plywood, use a fine-toothed blade to avoid chipping or tearing the material.
2. To create raised panel doors, rout a rebate around the perimeter of each door using a router and flush trim bit. The rebate should be approximately 1/4″ deep and 3/4″ wide.
3. Now you’ll need to cut stiles (the vertical pieces) and rails (the horizontal pieces) for your door frame.
For each stile, make sure to leave enough room at the top and bottom so that the door can be properly installed later on. It’s also important to take into account the thickness of your raised panel when cutting these pieces – you don’t want them too tight or too loose! Once all of your stiles and rails are cut, dry fit them together using dowels and clamps to make sure everything lines up nicely before moving on to the next step.
4. Using wood glue and either brad nails or screws (preferably countersunk), assemble your frame making sure that everything is square as you go along.
5. Once your frame is complete, carefully insert your raised panel into place taking care not to damage it in any way.
6. To finish things off, add some molding around the perimeter of the door if desired – this will give it a more polished look.
Installing cabinet doors is relatively straightforward once you have all of your materials prepared ahead of time. With just a few tools and some careful measuring, anyone can do it!
How Do You Attach Decorative Trim to Cabinets?
There are a few ways to attach decorative trim to cabinets. The most common method is to use construction adhesive or screws. Construction adhesive is a strong bonding agent that will hold the trim in place permanently.
However, it can be difficult to remove if you ever need to repair or replace the trim. Screws are also a permanent option, but they’re much easier to remove and won’t damage the cabinets if you need to make repairs. You can also use temporary adhesives like double-sided tape or Command strips, which will allow you to remove the trim without damaging the cabinets.
Best Adhesive for Cabinet Skins
You’ve just installed new cabinet skins to give your kitchen an updated look, but now you’re wondering what’s the best way to keep them in place? Luckily, there are a few options available that will work well for this specific application.
Here are a few of our top picks:
1. 3M Heavy Duty Construction Adhesive: This product is designed for bonding heavy materials like wood and metal, so it’s more than up for the task of holding your cabinet skins in place. It’s also weather resistant, so you don’t have to worry about it losing its grip in high humidity or wet conditions.
2. Gorilla Glue Clear Grip: Another great option for attaching cabinet skins is Gorilla Glue Clear Grip.
This product forms a strong bond with both porous and non-porous surfaces, so it will adhere well to most types of cabinets. Plus, it’s clear formula means it won’t discolor your skins or leave behind any unsightly residue.
3. Loctite Power Grab Express: If you’re looking for an adhesive that sets quickly, Loctite Power Grab Express is a good choice.
It bonds instantly to most surfaces and provides a strong hold that can withstand heavy use. Plus, it comes in a convenient aerosolized spray can format which makes application quick and easy.
- Self-Adhesive and Removable: Easy to install,self-Adhesive and removable,peel and stick wallpaper can be applied to most flat and dry surfaces, just peel and paste.If the paste fails, wallpaper will not leave glue on the surface after removal
- Material and Size: The size of each roll of wood grain wallpaper is 17.7 inches wide and 118 inches long(45cm × 3m), covering an area of 12.86 square feet. We also have larger sizes for you to choose. Larger size can cover larger area without splicing. The surface is covered with film, which is the wear layer, fadeless, durable
- Usage scenario: Wood grain paper can be used for smooth surface positions, such as living room walls, bedroom walls, desks, cabinets, coutertops, drawers, laundry, bathroom and other places where you need them to meet your decorative needs
- Thickness Upgrade : Wood self adhesive wallpaper is made of thickened PVC material,can cover up the original background and will not easy to see through
- Solve the Problem for You: Due to different resolutions of devices and different light sources (such as cold and warm light), actual objects may have slight color differences from the image. If you need to use more, it is recommended to purchase large size and purchase enough rolls at once. If you have any questions about the product, you can tell us and we will solve your problem as soon as possible!Happy shopping

- Constructed of high quality wood for lasting durability Designed for use in 3″ wide spaces No wiggle design provides maximum stability End panel not included Soft close slides for smooth and quiet use Covered by a limited lifetime manufacturer warranty

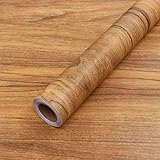
- CONTACT PAPER DESIGN–Classic light wood contact paper, featuring warm and bright hues, is ideally suited for home decoration options. It seamlessly blends into most home styles, creating a harmonious and aesthetically pleasing ambiance.
- PEEL AND STICK WALLPAPER SIZE–17.7” x 78.7”/Roll(In other words,1.47’ x 6.5’/Roll ), it covers 9.5 sq.ft per roll.
- APPLICABILITY–Suitable for decorating cabinets, tables, drawers, shelves, countertops, walls, etc. Wallpaper made of environmentally friendly materials.
- FEATURES–Faux vinyl/pvc material. Self adhesive, easy to apply, no need to use extra glue. Waterproof (but not for bathroom use). Indoor use, ideal for most smooth flat surfaces such as walls, furniture,etc.This is a flat print and that there is no embossed texturing on the adhesive.
- HOW MANY ROLLS TO BUY–We will calculate for you and recommend you the most economical purchase plan such as what size to buy and how many rolls to buy. Just email us or inquire by asking a question.
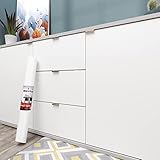
- ☁️ – 【White Contact Paper】:Upgrade superior vinyl material makes this white contact paper thicken and durable, not easy to tear.
- ☁️ – 【White Contact Paper】:30 x 120 inches, 76cm x 3m. Coverage is 25 sq.ft. The back of contact paper is printed with lined grid for cutting into any sizes/shapes easily.
- ☁️ – 【White Contact Paper】:Matte finish, soft touch, strong-adhesion, waterproof, oil-proof, bubble-free design, easy to clean, repositioned and removable without sticky residue.
- ☁️ – 【White Contact Paper】:For remodeling and decorating cabinets, accent walls, bedroom, dresser, shelves, table, nightstand, drawer, countertops, fireplace, as wrapping paper, etc.
- ☁️ – 【White Contact Paper】:If you are not satisfied with white contact paper or have any other questions, please feel free to contact us and we will try our best to help you.

- REAL WOOD VENEER SHEET – Unfinished and ready for stain and finish. Veneer provides stability and flexibility for any restoration project
- Grain and Color appearance variation can be expected from sheet to sheet and lot to lot, it will vary from what is pictured because it is a natural wood product
- PREMIUM QUALITY – Gives you confidence that the wood will be right for your project
- EASY TO USE – These veneer sheets are easy to cut to the size you need and are easy to stain.
- “GREAT FOR CURVED SURFACES – VERSATILE MATERIAL FOR RESTORATION – Great for a variety of restoration projects such as repair or refurbishment of cabinets, shelves, doors, tables, or other furniture COST-EFFECTIVE REFURBISHMENT – These veneer sheets are a cost-effective way to refurbish existing furniture without needing to replace”

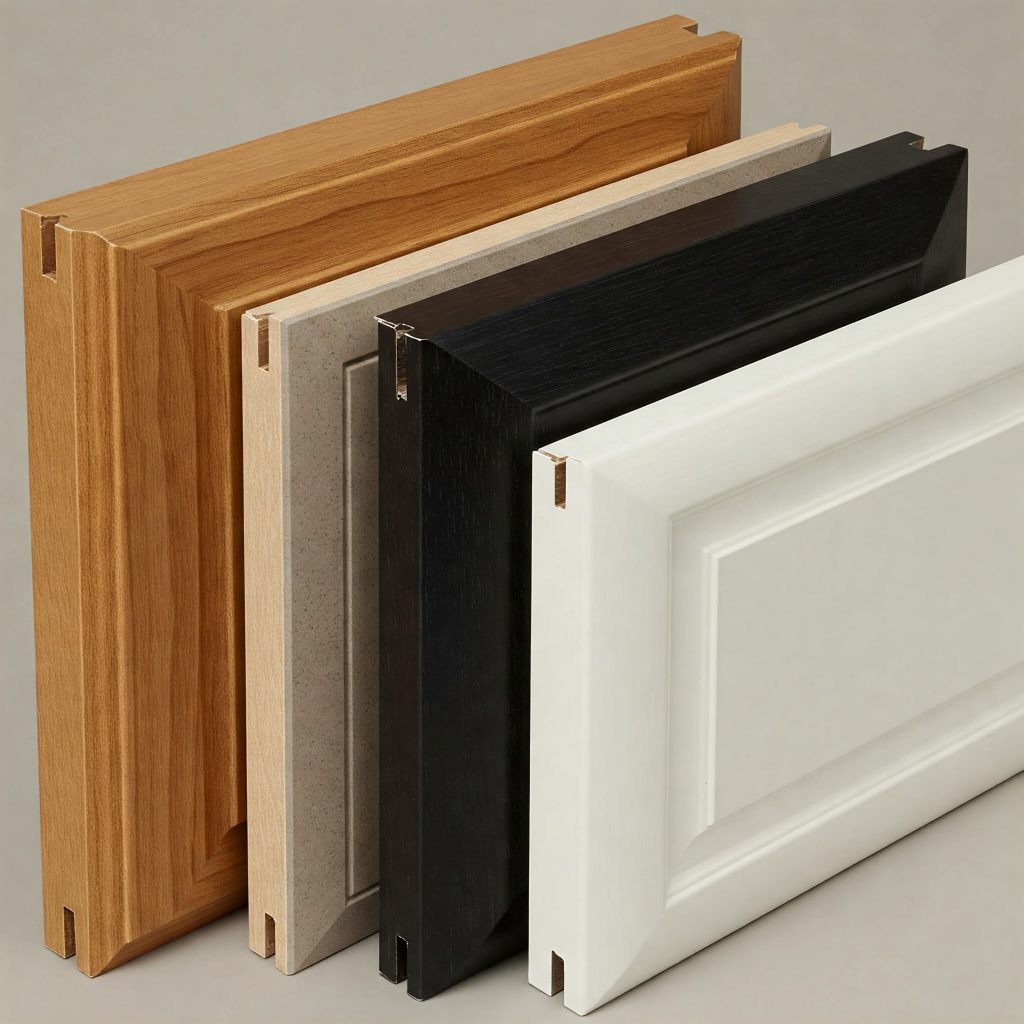
- MEASUREMENTS: Measurements are EXACT. This replacement raised panel kitchen cabinet door measures 14.75-inches Wide, 22.5-inches high, and 3/4-inches thick
- Stains beautifully with a wide range of finish tones. Color ranges from nearly white cream color to a beautiful warm, pale brown heartwood, tinted with red
- Heavy, strong, hard, stiff and durable under exposure. Holds nails and screws well. All doors are glued w/ 2 pins inserted at every joint
- Constructed from premium red oak, they are ready to be stained or painted to match your existing cabinets
- Proudly Made In The USA
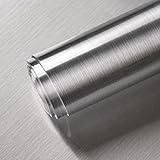
- 【DETAILS】:17.7 inches×78.7 inches(1.48 ft×6.56 ft), covers 9.71 sq.ft. Strong coverage, upgrade and thicken stainless steel wallpaper, using upgrade PVC material, waterproof wallpaper. More durable than traditional wallpaper
- 【EASY TO INSTALL】:Stainless steel contact paper. There are precise grid lines on the back of the paper, which can be cut and cut without professional tools, you can cut it to any size you want, and one person can do it. Easy to install
- 【SELF-ADHESIVE & REMOVABLE】:Metal look wallpaper, just peel and stick, no additional glue is required. Removable wallpaper, can be easily repositioned after removal without damaging the decorative surface or leaving any adhesive
- 【MULTI-PURPOSE】:Stainless steel wallpaper, looks like real stainless steel. It has a certain specular reflection effect and looks very textured and shiny. You can use it to decorate any place you want, such as refrigerator, dishwasher, oven, kitchen backsplash, closet, table, etc. no matter where you choose, it is a good choice
- 【WARM TIPS】:Just try our stainless steel contact paper and if you don’t absolutely love them let us know and we’ll take care of your worries. You have nothing to lose so ORDER NOW
- 【Peel and Stick Wallpaper】Size: 15.9in X 78.7in.(covers 8.7 sq.ft)
- 【Superior Glue & Thicker Paper】Wallpaper is thicker than normal wallpaper so it is not easily torn. Made of durable vinyl, it’s Non-toxic, Durable, Environment-friendly. Safe for your home and house wall.
- 【Easy to Install & Clean】Just simply peel and stick wallpaper. No extra glue needed. It’s oil resistant and waterproof. Easy to clean with a wet cloth.
- 【Various uses】Removable wallpaper is suitable for smooth surfaces, refurbishment of tables and furniture, backsplashes, wall decoration, bathrooms, kitchen counters, furniture, dressing table drawers, crafts, bedside tables, bookcases, doors, etc.
- 【Note & Warranty Service】The wallpaper is creased easily, please be careful when paste. If you have any problem about the wallpaper (such as color difference or creases ) please contact us in time. We will try our best to satisfy customers and give you a good shopping experience.
- 🏠DETAILS: 15.8 X78.8 INCH, total 8.65 sq.ft(40cmX2m), Self adhesive(No extra glue needed). Made of durable vinyl, Light wood look contact paper peel and stick, Waterproof. Oil resistant. Fully removable.
- 🏠DIY FREELY: Trimming gridlines on backing paper for precise measurements, cut to any sizes, self stick on any smooth counters or cabinets. Premium painting Ensures No Fading for Years.
- 🏠All-PURPOSE: Wood contact paper for countertops, wood grain contact paper for desk, butcher block contact paper for table top, faux wood wallpaper for kitchen cabinet cover, wood stickers for furniture, contact paper for cabinets and drawers, countertop contact paper for kitchen counter, wood peel and stick countertops for kitchen.
- 🏠WATERPROOF: The wood contact paper is made of PVC Vinyl on top, the vinyl can’t form hydrogen bonds with water molecules. Even if it comes in contact with water, it does not react to it and it does not get damagd. is ideal for refurbishing your countertops.
- 🏠USE: Light wood contact paper for countertop, table top, desk, cabinets, island, buffet cabinets, TV stand, vanity, pantry, wardrobes, dining table, crafts, windows, nightstands, hutch, accent walls, dresser, drawer, closets, gallery wall, cabin, cubicle, lake house, industrial, dorm, living room, farmhouse, bedroom wall, playroom, laundry room, office decor.

- 【DIMENSIONS AND DETAILS】: 15.7”×78.7”/roll wood wallpaper, (8.6 Square Feet / Roll), Grid design on the back for easy measurement and cutting.
- 【WOOD GRAIN WALLPAPER】: wood grain wallpaper that very easy to install. And don’t worry about splicing, because it will work fine.
- 【WOOD GRAIN WALLPAPER】:Thickened material with strong covering power. Not easy to tear, PVC material, with waterproof properties, easy to clean.
- 【WOOD GRAIN WALLPAPER】: MelunMer wood grain wallpaper is self-adhesive wallpaper that can be easily repositioned after removal without leaving any marks or damaging decorative surfaces.
- 【WOOD GRAIN WALLPAPER】: Wood Shiplap Wallpaper has many applications. Intended for use on wall, glass, kitchen counter, door, furniture, dressing table drawer crafts, bedside tables, bookcases, porch ark.
Conclusion
If you’re looking to give your kitchen a facelift, one of the easiest ways is to attach cabinet end panel skins.
Here’s a step-by-step guide on how to do it:
1. Measure the width and height of the end panel and cut the skin accordingly.
2. Apply construction adhesive to the back of the skin and position it on the end panel.
3. Use a roller or brush to smooth out any bubbles or wrinkles.
4. Drill pilot holes through the skin and into the end panel, then screw in place.