So, you’re looking to take your pool to the next level—enhancing its stability, ensuring safety, increasing surface height, or perhaps leveling its capacity. Whatever your goal may be, there’s a simple yet highly effective solution: using pavers under pool legs. But how to put pavers under pool legs?
To put pavers under pool legs, prepare the area and ensure a level surface. Strategically place the pavers beneath each leg, ensuring alignment and stability. Check with a level and adjust if needed. Secure the pavers by compacting the surrounding soil or using adhesive. Finally, test the pool for stability and make adjustments as necessary. Pavers provide enhanced stability, safety, and aesthetic appeal to your pool, creating a solid and long-lasting foundation.
Sounds tough? Well, we will show you the right way to do it. And trust me, it is not that tough. Without proper guide, you can do it.
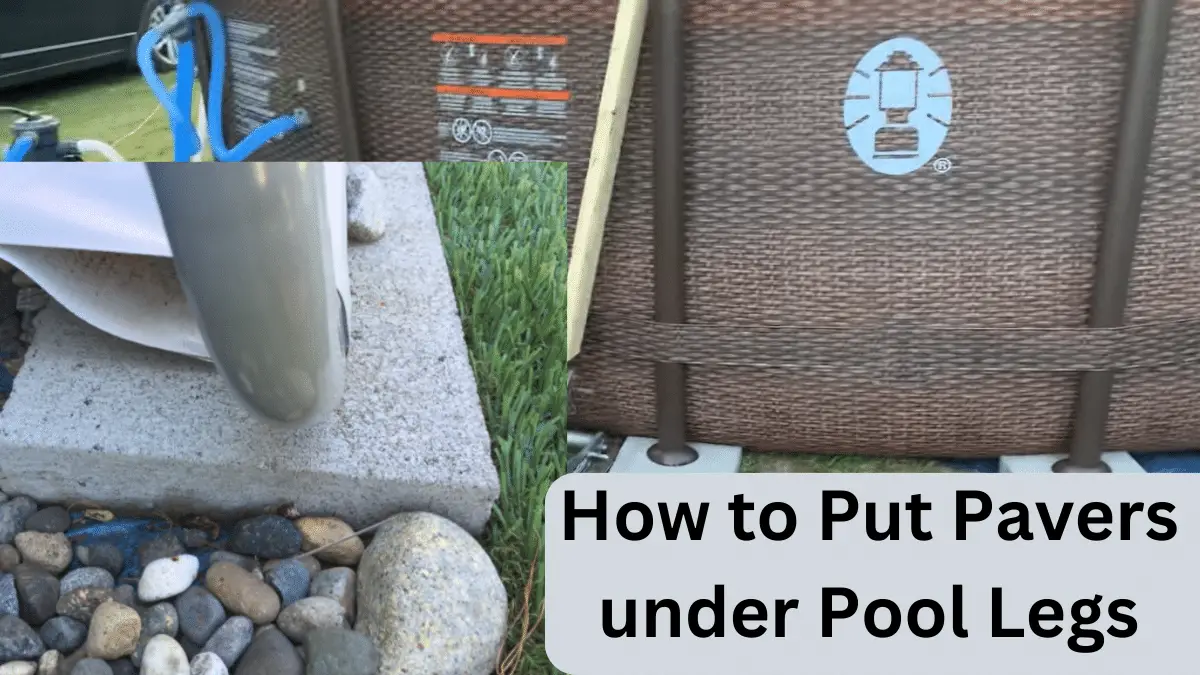
How to Put Pavers under Pool Legs Like a Pro
Let’s show you the step by step guide.
Prepare the area and ensure a level surface.
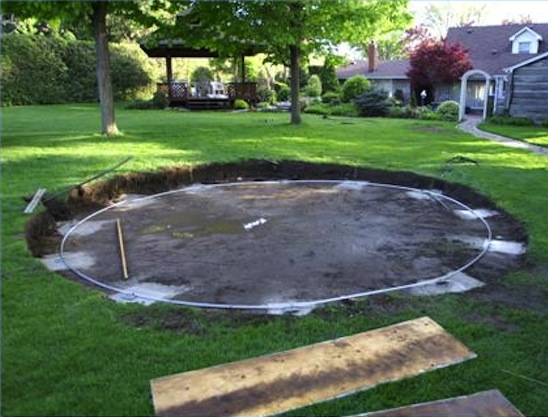
To prepare the area for placing pavers under pool legs, start by clearing the ground of any debris, rocks, or vegetation. Ensure that the surface is clean and free from any obstructions. Next, make sure the ground is level by using a level tool or visually inspecting for any noticeable slopes or unevenness.
If the surface is not level, you may need to perform additional leveling by adding or removing soil as necessary. A level surface is crucial to provide a stable foundation for the pavers and ensure proper alignment and support for the pool legs.
Place the pavers beneath each pool leg.
- Begin by identifying the locations where the pool legs will be placed.
- Place a paver on the ground directly beneath each pool leg position.
- Adjust the position of the pavers to ensure they are centered and aligned with the pool legs.
- Ensure that the pavers are level with each other and with the ground surface.
- Make any necessary adjustments to the position of the pavers to achieve proper alignment and stability.
- Double-check that each paver is securely positioned beneath its respective pool leg before proceeding to the next step.
Ensure proper alignment and stability.
To ensure proper alignment and stability, follow these steps:
- Identify the locations where the pool legs will be placed.
- Position a paver directly beneath each pool leg location.
- Adjust the pavers to ensure they are centered and aligned with the pool legs.
- Confirm that the pavers are level with each other and the ground surface.
- Make any necessary adjustments to achieve proper alignment and stability.
- Double-check that each paver is securely positioned beneath its corresponding pool leg.
Use a level to check and adjust as needed.
Here are detailed steps for using a level to check and adjust the pavers:
- Obtain a level tool, commonly known as a spirit level, from a local hardware store or borrow one from a friend.
- Place the level horizontally on top of the pavers, ensuring it spans multiple pavers.
- Check the bubble inside the level’s vial. The pavers are not level if the bubble is not centered between the two lines.
- To adjust the pavers, first, identify the areas that need correction. These may be higher or lower than the desired level.
- If a paver needs to be raised, gently lift it and add or remove compacted soil or sand beneath until the level indicates that it is level.
- If a paver needs to be lowered, carefully lift it and remove excess soil or sand, ensuring not to disrupt the surrounding pavers.
- Place the paver back in its position and recheck the level to verify if it is now level.
- Repeat checking, adjusting, and rechecking until all the pavers are perfectly level in all directions.
- Take your time and be meticulous during the leveling process to achieve accurate results. It is crucial for stability and proper weight distribution.
Secure the pavers in place.
To securely hold the pavers in place, follow these steps:
- Once the pavers are properly aligned and level, ensure they are in the desired positions.
- Begin by compacting the soil or base material around the pavers using a hand tamper or a plate compactor.
- Apply downward pressure evenly across the pavers and surrounding area to create a stable base.
- For additional stability, you can consider using paver adhesive. Apply the adhesive according to the manufacturer’s instructions, typically by spreading it on the bottom of each paver before placing it back in position.
- Press down firmly on each paver to ensure proper adhesion to the ground or base material.
- Allow sufficient time for the adhesive to cure, as specified in the manufacturer’s guidelines, before putting any weight or pressure on the pavers.
- If you did not use adhesive, periodically check the pavers’ stability over time and recompact the surrounding soil or base material as needed to maintain their position.
By following these steps, you can effectively secure the pavers in place, providing long-lasting stability and preventing any shifting or movement during use.
Compact the surrounding soil or use adhesive.
To compact the surrounding soil or use adhesive for securing the pavers, follow these step-by-step instructions:
- Once the pavers are properly aligned and leveled, ensure that they are in their desired positions.
- If you choose to compact the soil, start by removing any loose soil or debris from the surrounding area of the pavers.
- Use a hand tamper or a plate compactor to compact the soil. Begin at the edges and work your way toward the center of the pavers.
- Apply downward pressure evenly across the compacting tool, covering the entire area around the pavers.
- Repeat the compaction process multiple times, going over the area in different directions to ensure the soil is firmly packed.
- If you opt to use adhesive, carefully follow the manufacturer’s instructions provided with the adhesive product.
- Apply the adhesive to the bottom of each paver according to the recommended amount and distribution pattern.
- Place the pavers back into their positions, ensuring they fit snugly and align with adjacent pavers.
- Press firmly on each paver to ensure proper soil or base material adhesion.
- Allow sufficient time for the adhesive to cure, as specified in the manufacturer’s guidelines, before subjecting the pavers to any weight or pressure.
- If you choose not to use adhesive, periodically check the stability of the pavers over time and recompact the surrounding soil as needed to maintain their position.
Test the pool for stability.
To test the pool for stability, follow these step-by-step instructions:
- Ensure that all the pavers are securely in place beneath each pool leg.
- Carefully inspect the pool structure for wobbling, shifting, or unevenness.
- Gently apply pressure to different pool areas, including the edges and corners, to check for movement or instability.
- Observe the pool’s response to the pressure applied. A stable collection should remain firm and stationary.
- If you notice any instability or movement, carefully assess the problem area to determine the cause.
- Consider whether the pavers are correctly aligned and level. If not, make any necessary adjustments to achieve stability.
- Check the pool’s stability after each adjustment to ensure the issue has been resolved.
- Repeat applying pressure and observing the pool’s response to verify its stability.
- If the pool remains stable and shows no movement, the pavers provide the necessary support and stability.
- Monitor the pool’s stability periodically, especially after heavy use or changes in weather conditions, and make any adjustments as needed to maintain stability.
Make any necessary adjustments.
To make any necessary adjustments, follow these step-by-step instructions:
- Assess the pool area and observe for any signs of instability, unevenness, or misalignment.
- Identify the specific areas or pavers that require adjustment.
- If a paver needs to be raised, carefully lift it with both hands and add or remove compacted soil or sand beneath it.
- Use a level to check the paver’s alignment and ensure it is level with the surrounding pavers.
- If a paver needs to be lowered, gently lift it and remove excess soil or sand beneath it.
- Recheck the level to confirm that the paver is leveled with the surrounding pavers.
- Make gradual adjustments to avoid sudden movements disrupting the pool’s stability.
- Adjust and recheck the pavers until all are properly aligned, level, and stable.
- Once all adjustments have been made, retest the pool for stability by applying pressure to different areas and checking for any movement or wobbling.
- The necessary adjustments have been successfully made if the pool remains stable and exhibits no instability.
What are the best things to put under pool legs?
Here are the best things you can put under pool legs.
Option 1: Concrete Pads
Concrete pads are popular for supporting pool legs due to their stability and durability.
Pros
- Excellent stability: Concrete pads provide a solid and level surface, ensuring proper weight distribution and stability for the pool.
- Durability: Concrete is known for its long-lasting properties, withstanding heavy loads and resisting weather conditions.
- Low maintenance: Once installed, concrete pads require minimal maintenance, making them a convenient option for pool leg support.
Cons
- Costly installation: Installing concrete pads can be expensive, involving excavation, formwork, and pouring of concrete.
- Potential cracking: Over time, concrete pads may develop cracks, which may require repairs or replacements.
- Lack of adjustability: Once the concrete pads are installed, they are not easily adjustable, limiting flexibility if changes are needed.
Option 2: Pavers
Pavers offer a versatile and aesthetically pleasing option for supporting pool legs.
Pros:
- Stability and versatility: Pavers provide stability and support, ensuring a level surface for the pool legs. They are available in various styles, shapes, and colors, allowing for customization and creating an attractive pool area.
- Ease of installation: Compared to concrete pads, pavers can be relatively easier to install, requiring less labor and equipment.
- Adjustability: Pavers can be adjusted or rearranged if needed, providing flexibility for modifications or repairs.
Cons:
- Potential shifting: Pavers may shift over time without proper compaction or adhesive, requiring periodic readjustment to maintain stability.
- Cost considerations: The cost of pavers can vary depending on the material and design chosen. Some paver options can be more expensive compared to other alternatives.
- Maintenance requirements: Pavers may require occasional cleaning, weed control, and re-leveling if settling occurs.
Option 3: Rubber or Foam Pads
Rubber or foam pads are cushion-like materials that can provide support and stability for pool legs.
Pros:
- Cushioning and protection: Rubber or foam pads offer a cushioning effect, protecting the pool legs and the ground beneath from potential damage caused by shifting or impact.
- Easy installation: These pads are typically lightweight and easy to handle, making installation quick and hassle-free.
- Adjustable: Rubber or foam pads can be easily adjusted or repositioned as needed, allowing for flexibility in case of any changes or repairs.
Cons:
- Limited stability: Rubber or foam pads may not offer the same level of stability as more solid options like concrete pads or pavers.
- Potential wear and tear: Over time, rubber or foam pads may degrade or compress, requiring replacements to maintain their effectiveness.
- Aesthetic considerations: Rubber or foam pads may not contribute to the overall aesthetic appeal of the pool area as much as other options.
Option 4: Adjustable Leveling Systems
Adjustable leveling systems are specially designed supports that allow for precise leveling of pool legs.
Pros:
- Excellent leveling capability: These systems offer precise adjustments to ensure a perfectly level surface for pool legs, even on uneven ground.
- Easy to use: Adjustable leveling systems are user-friendly, allowing for convenient adjustments without requiring specialized tools.
- Stability and load-bearing capacity: These systems are designed to provide strong support and stability with high load-bearing capacities.
Cons:
- Cost considerations: Adjustable leveling systems can be more expensive than other options due to their specialized design and functionality.
- Installation complexity: Setting up these systems may require more time and effort than simpler alternatives.
- Limited aesthetic appeal: While effective in functionality, adjustable leveling systems may not contribute to the visual aesthetics of the pool area.
Remember, choosing which option to support pool legs depends on factors such as budget, desired stability, ease of installation, and aesthetic preferences. Considering the specific needs and priorities will help in selecting the most suitable option.
Should I use pavers for install on a round soft side above ground pool on ground?Answer is YES!
Using pavers for the installation of a round soft-sided above-ground pool on the ground can be a beneficial choice. Here are some factors to consider:
- Stability: Pavers provide a solid and stable foundation for the pool. They help distribute the weight of the pool evenly and minimize the risk of shifting or sinking.
- Leveling: Pavers can assist in achieving a level surface for the pool. This is crucial for proper water balance, safe use, and longevity of the pool.
- Protection: Pavers act as a protective barrier between the pool and the ground. They help prevent punctures or tears in the pool liner caused by rocks, roots, or uneven surfaces.
- Aesthetics: Pavers can enhance the visual appeal of your pool area by creating a defined and finished look. They offer a variety of styles, shapes, and colors to choose from, allowing you to customize the appearance to your liking.
However, keep in mind that the specific requirements for installing a soft-sided above-ground pool may vary based on the manufacturer’s instructions. It is important to consult the pool manufacturer’s guidelines and recommendations for the proper installation method. Additionally, consider any local building codes or regulations that may apply to above-ground pool installations in your area.
Overall, using pavers can provide added stability, leveling, protection, and aesthetic appeal to your soft-sided above-ground pool installation on the ground.
And to do that,
- Clear the area around the pool legs
- Remove any debris, rocks, or grass that may be in the way
- Place a layer of sand on the ground, covering the entire area where the pavers will be placed
- Lay the pavers in your desired pattern on top of the sand
- Make sure they are level and even with each other
- Use a wet saw to cut any pavers that need to be trimmed to fit properly around the pool legs
- 5 Once all of the pavers are in place, use a tamper or vibrating plate compactor to compact them into place
Pressure Treated Wood under Intex Pool Legs
If you have an Intex pool, you may be wondering if you can use pressure treated wood for the legs. The answer is yes! Pressure treated wood is a great material to use for the legs of your pool because it is durable and will last long.
Plus, it is easy to find and relatively inexpensive.When choosing pressure treated wood for your Intex pool legs, be sure to select a type that is rated for ground contact. This will ensure that the wood can withstand any moisture or insects that may come in contact with it.
You should also look for a variety of sizes so that you can find the perfect fit for your pool.Once you have the pressure treated wood, cut it to size and then sand down any rough edges. Be sure to wear gloves and a mask when doing this to avoid inhaling any fumes from the wood.
Then, simply screw or nail the pieces into place on your pool legs. That’s it! You now have a sturdy and reliable foundation for your Intex pool.
Best Thing to Put under Pool Legs
Are you looking for a way to level out your above ground pool? Do you want to make sure your pool is stable and not wobbling? If so, then you need to find the best thing to put under pool legs.
This will help take the pressure off of the pools frame and make it more stable.One option is to use sandbags. You can purchase these at most hardware or home improvement stores.
Simply fill them with sand and place them under each leg of the pool. Another option is to use cinder blocks. These are ideal because they are heavy and will provide a lot of stability.
Just be sure to wrap them in a towel or something similar so they don’t scratch your liner.Whichever method you choose, be sure to test it out before adding water to the pool. This will ensure that your pool is level and stable before filling it up.
Wood under Pool Legs
If you have a wooden pool, you know that one of the most important things to do is to keep the wood away from moisture. This is especially true for the legs of your pool, which are constantly in contact with water. Here are some tips on how to protect your wood and keep it looking good:
– First of all, make sure that the legs of your pool are made of treated lumber. This will help them resist rot and decay.– If possible, raise the legs of your pool off the ground.
This will allow air to circulate around them and prevent moisture from seeping in.– If you live in an area with high humidity, consider using a dehumidifier near your pool. This will help keep the air around the pool dry and discourage mold growth.
– Finally, inspect the legs of your pool regularly for signs of damage or decay. If you catch problems early, they will be easier to fix than if they are allowed to progress unchecked.
What to Put under above Ground Pool to Level
If you have an above ground pool, you may be wondering what to put under it to level it out. There are a few different options that you can choose from, and the best option for you will depend on your specific situation. Here are a few things to consider when choosing what to put under your above ground pool:
-The first thing you need to do is take measurements of your pool and the area around it. This will help you determine how much material you will need to level out your pool.-Next, consider what type of material you want to use.
There are a variety of options available, including sand, gravel, pavers, and more. Each option has its own set of pros and cons, so be sure to do your research before making a decision.-Once you’ve decided on a material, it’s time to start leveling out your pool area.
Be sure to evenly distribute the material until the entire area is level. You may need to add or remove material as needed until everything is perfect.following these simple tips should help ensure that your above ground pool is level and stable for years to come!
Intex Pool Legs 52 Inch Deep
If you’re looking for a quality above-ground pool that will last for years, then you need to check out the Intex Pool Legs 52 Inch Deep. This pool is made with heavy-duty vinyl and features metal frame legs that are powder coated for durability. The liner is also puncture resistant and has a U-shaped design that provides maximum support.
Plus, the easy to set up instructions make assembly a breeze.
Credit: www.inyopools.com
Can You Put Pavers under Pool Legs?
Yes, you can put pavers under pool legs. This will provide extra support for the pool and prevent it from settling over time. Pavers are also easy to install and can be found at most home improvement stores.
What Do You Put under Pool Legs?
If you have a pool, you probably already know that it’s important to keep the area around the pool clean and free of debris. But what about under the pool? It’s just as important to keep the area under your pool clean and free of debris, especially if you have small children or pets.
One way to keep the area under your pool clean is to put something under the legs of the pool. This will help to catch any dirt, dust or leaves that fall into the space between the legs of the pool. You can use anything from an old sheet to a tarp to cover the area under your pool.
Just make sure that whatever you use is large enough to cover the entire space and is securely fastened so that it doesn’t blow away in windy weather.Another way to keep the area under your pool clean is to sweep it out on a regular basis. This will help to remove any build-up of dirt, dust or leaves.
If you have a lot of trees near your pool, you may want to consider sweeping out more often.Whatever method you choose for keeping the area under your pool clean, be sure to do it regularly so that your family can enjoy a safe and healthy swimming environment all summer long!
What to Put under Pool Legs to Keep from Sinking?
If you’re worried about your pool legs sinking, there are a few things you can do to prevent this. First, make sure that the ground around your pool is level. If it’s not, then water can collect on one side of the pool and cause it to sink.
Second, you can put sand or gravel under the pool legs. This will help to distribute the weight of the pool more evenly and keep it from sinking. Finally, if you live in an area with a lot of rain or snowfall, you may want to consider putting your pool on a concrete pad.
This will help to keep the ground around your pool dry and prevent it from sinking.
What Should I Put under My Above-Ground Pool Legs?
You should put sandbags or cinder blocks under your above-ground pool legs to keep the pool from tipping over. You will need to put one bag or block under each leg.
Conclusion
If you have a pool with legs, you may want to put pavers under them. This will help to level the pool and also make it look nicer. Here are some tips on how to do this:
1. First, you will need to measure the area where the pavers will go. Make sure to account for the width of the pavers as well.2. Next, mark out the area with string or chalk so that you know where to dig.
3. Start digging! You’ll want to make sure that the hole is slightly bigger than the paver itself. This way, there is room for adjustment if needed.
4. Once all of the holes are dug, it’s time to start placing the pavers in them. Make sure that they are level before moving on to the next one!5. Finally, fill in any gaps around the pavers with sand or gravel and then give your new pool legs a good brush down.