We often need to replace a Kohler canister flush valve with a flapper if it is inefficient, causes constant running or leaks, or for easier cleaning and maintenance. Replacing your Kohler canister flush valve with a flapper can be an easy and cost-effective way to fix common problems like frequent toilet refilling, running water, or occasional overflowing. But how to do that?
To replace a Kohler canister flush valve with a flapper, you will need to first turn off the water supply to the toilet. Once this is done, remove the old canister flush valve by unscrewing it from the tank. Disconnect any hoses or pipes that are attached to it and discard them.
Next, install the new flapper onto the overflow tube inlet at the top of your tank using two screws provided with your kit. Connect any necessary hoses and pipes back into place before carefully lower your new flapper down into position over its drop hole in your tank’s bottom. Securely tighten all connections and check for leaks before finally turning on your water supply again and testing out your new setup.
Easy steps – How to replace Kohler canister flush valve with flapper
Let’s see the easy and details process.
Step 1: Gather the necessary tools and materials
Before you begin, gather all the tools and materials required for the task. You’ll need an adjustable wrench, a screwdriver, a flapper flush valve kit specifically designed for your Kohler toilet model, and a replacement flapper.
These can be purchased at your local hardware store or online. The cost of the flapper flush valve kit and replacement flapper will vary depending on your location and the specific product you choose.
Expect to spend around $20 to $40 for these items. Additionally, set aside some time for this project. On average, it should take about 30 minutes to an hour to complete the replacement process.
Step 2: Turn off the water supply and empty the tank
Locate the water shut-off valve located behind your toilet and turn it clockwise to shut off the water supply. Flush the toilet to empty the tank completely.
To prevent any water spills, place a towel or sponge inside the tank and soak up any remaining water.
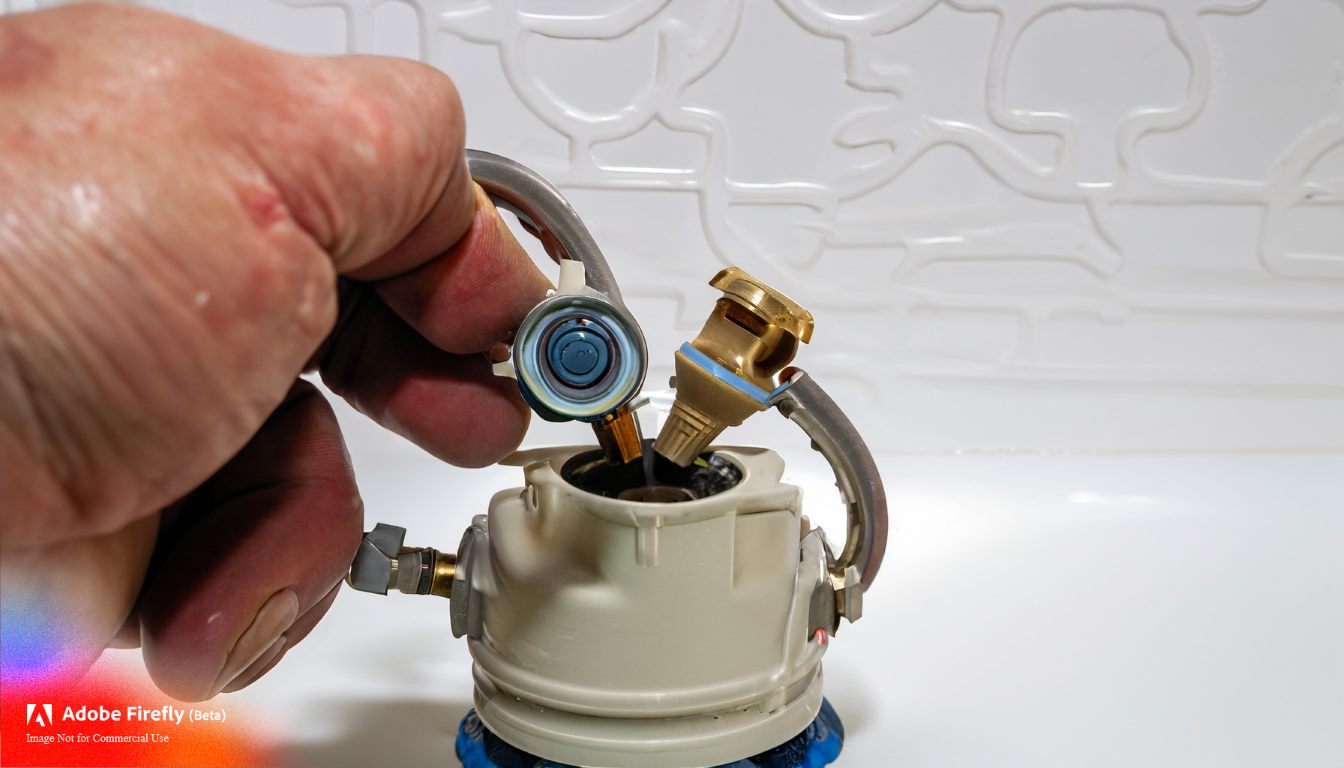
Step 3: Remove the canister flush valve
Using an adjustable wrench, loosen and disconnect the water supply line from the bottom of the canister flush valve. This valve is typically connected to the fill valve assembly.
Next, detach the canister flush valve by twisting it counterclockwise and lifting it out of the tank. Set it aside for proper disposal.
Step 4: Install the flapper flush valve kit
Take the new flapper flush valve kit and carefully read the manufacturer’s instructions for installation. Follow the provided steps to ensure proper alignment and secure the new valve into the opening at the bottom of the tank.
Use your adjustable wrench to tighten it clockwise until it feels snug. Make sure not to overtighten, as this could cause damage.
Step 5: Attach the replacement flapper
With the flapper flush valve kit in place, attach the replacement flapper according to the instructions provided. Most flappers simply clip onto the flush valve or attach using hooks or retaining tabs.
Ensure the flapper is correctly aligned and securely connected to the flush valve, as a proper seal is crucial for efficient flushing.
Step 6: Test the flush and adjust as necessary
Turn the water supply back on by turning the shut-off valve counterclockwise. Allow the tank to fill up, and then perform a test flush to ensure the flapper functions correctly.
Observe the flush cycle and check for any issues such as incomplete flushing or water leakage. If needed, adjust the flapper’s chain length or position to achieve optimal flush performance.
This adjustment can be done by simply moving the chain clip up or down on the flush lever.
Step 7: Check for leaks and reassemble
After adjusting the flapper, carefully inspect the area around the new flapper flush valve and check for any leaks. Pay close attention to the connections between the flush valve and the water supply line.
If you notice any water leakage, use your adjustable wrench to tighten the connections or adjust the components as needed. Once you are confident there are no leaks, reassemble the tank lid and any other components you removed during the process.
Remember, if you encounter any difficulties or are unsure about any step, it’s always a good idea to consult a professional plumber for assistance.
Step 8: Adjust the water level in the tank
After installing the flapper flush valve and ensuring there are no leaks, it’s essential to adjust the water level in the tank. The water level should be set to the manufacturer’s recommended level, typically marked on the inside of the tank or mentioned in the instruction manual.
To adjust the water level, locate the fill valve, which is usually a vertical tube in the center of the tank. On the fill valve, you’ll find a float mechanism, either a floating ball or a float cup. Adjust the float mechanism to achieve the desired water level.
Follow the manufacturer’s instructions for your specific fill valve to make the adjustment. It’s important to have the correct water level to ensure proper flushing and avoid water waste.
Step 9: Clean or replace other components (optional)
While you have the toilet tank open, it’s a good opportunity to inspect and clean or replace other components if necessary. Check the fill valve for any signs of wear or corrosion.
If it appears damaged or not functioning optimally, consider replacing it. Additionally, inspect the flush handle and flush lever mechanism for any issues. Clean or lubricate them as needed to ensure smooth operation.
This step is optional but can help improve the overall performance and longevity of your toilet.
Kohler Canister Flush Valve Problems
Kohler canister flush valves are some of the most reliable and efficient flushing systems available today, but they can still experience problems over time. Common issues include clogs, leaks, and a lack of water pressure. If you’re experiencing any of these problems with your Kohler canister flush valve, it’s best to contact a professional plumber for assistance in diagnosing and fixing the issue.
How to Install Kohler Flush Valve Kit
Installing a Kohler flush valve kit is an easy task that can be completed in just a few steps. First, turn off the water supply to the toilet and then remove the old flush valve from inside your tank. Next, install the new Kohler flush valve assembly into your tank and connect it to both the fill tube and overflow tube with provided screws.
Finally, test it out by turning on the water supply again and flushing your toilet to make sure everything is working properly. With these simple steps you can have a brand new Kohler flush valve installed in no time!
Canister Flush Valve Vs Flapper
The two main types of toilet flush valves are the canister flush valve and flapper. The canister flush valve is a more modern type of toilet flush valve that uses a cylinder-shaped mechanism to control how much water flows into the bowl, which allows for precise levels of water usage. On the other hand, flappers use a rubber stopper in order to open and close the tank’s drain hole when you push down on the handle.
Flappers are often less expensive than canister valves but require more maintenance since they don’t last as long due to wear and tear from regular use. Both types of valves offer different advantages depending on your needs; however, if you’re looking for an efficient way to save money on your water bill, then it might be worth investing in a canister flush valve over a flapper.
How to Replace Kohler Flush Valve Seal
Replacing the flush valve seal on your Kohler toilet is a simple job. First, turn off the water supply to the tank and shut off both valves behind the bowl. Then, remove the lid from the top of the tank and locate the flush valve seal—it should be visible at the bottom of the tank’s inner wall.
Using pliers or a flathead screwdriver, carefully pry out old seal. Once removed, insert new replacement seal into place by hand or with pliers—ensuring it sits snugly in its seat groove. Finally, reattach lid to top of tank and restore water supply before testing for proper operation.
How to Replace Kohler Flush Valve Gasket 83996
Replacing a Kohler flush valve gasket 83996 is an easy job that can be completed in just a few simple steps. First, turn off the water supply to the toilet and flush it completely. Next, unscrew the caps from both sides of the tank and pull out the old gasket.
Finally, insert the new gasket into place and screw back on both caps to secure it in place. With these quick steps your Kohler flush valve will be as good as new!
Kohler Canister Repair Kit
The Kohler Canister Repair Kit is an essential piece of equipment for anyone who needs to repair a Kohler canister flush valve. This kit includes everything you need to repair your canister, including a replacement flapper, fill tube seals, and screws. The easy-to-follow instructions make it simple to install the components correctly, so you don’t have to worry about making any mistakes during the process.
With this kit at your disposal, you’ll be able to quickly and effectively fix any problems with your Kohler canisters in no time!
Kohler Canister Flush Valve Replacement
Replacing the Kohler canister flush valve is an important task for any homeowner. This type of repair is relatively straightforward and involves removing the tank lid, unscrewing the old parts, and installing a new replacement valve. With a few basic tools and some patience, you can complete this repair in less than an hour.
If you need assistance or are not comfortable with making repairs on your own, it’s best to consult professional plumbing services to ensure that your Kohler canister flush valve is properly replaced.
Kohler Canister Flush Valve Seal
Kohler Canister Flush Valve Seals are designed to provide a watertight seal between the toilet tank and the flush valve. These seals are made of durable rubber material that is resistant to wear and tear, ensuring a long-lasting solution for your toilet’s needs. They also feature an easy-to-install design, allowing you to replace them in minutes without any tools or extra help.
With regular maintenance, these Kohler Canister Flush Valve Seals will keep your toilet working efficiently for years to come.

Credit: terrylove.com
How Do You Replace a Kohler Flush Valve With a Flapper?
Replacing a Kohler flush valve with a flapper requires following these steps:
-Turn off the water supply to the toilet.
-Disconnect the water line from the fill valve by unscrewing it.
-Remove any caps and nuts that secure the flush lever.
-Unscrew and remove the old flush valve, then discard it.
-Attach a new flapper onto the overflow tube of your new Kohler flush valve, securing it with clips or ties provided in its packaging.
-Connect one end of a new refill tube to your fill valve and attach its other end into an opening on top of your flush valve. -Insert two bolts through openings at each side of your tank’s bottom, screw them into threads inside your new Kohler flush valve and tighten them with pliers or adjustable wrench if necessary.
-Reconnect water supply line, turn on water and test toilet operation before replacing lid back onto bowl tank.
Can You Replace a Flapper With a Canister Flush Valve?
Yes, you can replace a flapper with a canister flush valve. This is a relatively simple process that involves the following steps:• Disconnect water supply to toilet
• Unscrew and remove flapper from tank
• Put the new flush valve in place
• Connect plastic tube to flush valve outlet port
• Attach refill tube to fill-valve inlet port & secure it with clipOnce these steps have been completed, your toilet should be working properly with the new flush valve installed.
How Do You Remove a Kohler Canister Flush Valve?
To remove a Kohler canister flush valve:
* Turn off the water supply to the toilet.
* Flush the toilet and unplug the fill tube from the overflow pipe.
* Unscrew and remove any nuts or bolts that secure the tank lid.
* Lift off and set aside the tank lid, then use pliers to unscrew and detach plastic clips from around canister.
* Carefully lift out canister with its attached gasket, taking care not to damage them in removal process.
Once removed cleansing of all parts is recommended before replacing with new components for proper functioning of your toilet’s flushing mechanism.
How Do You Replace a Kohler Canister Flush?
To replace a Kohler canister flush, follow these steps:– Turn off the water supply to the toilet.
– Disconnect the supply line and remove the tank lid.
– Unscrew and disconnect the flush valve from its manifold inlet holes.
– Install new seal gaskets between flange of flush valve and manifold holes.
– Connect new flush valve to manifold using screws or bolts supplied with kit.
– Reconnect water supply line to fill tank with water; check for leaks at connections.
– Replace lid on tank and turn on main water supply.Once all components are connected correctly, your Kohler canister flush should be successfully replaced!
Adjust and Install a Canister Flush Valve and Seal in Your Toilet
Conclusion
In conclusion, replacing a Kohler Canister Flush Valve with a Flapper is an easy and effective way to improve the operation of your toilet. By following the steps outlined in this blog post, you can quickly and easily upgrade your bathroom fixture. This simple process will save you time and money while ensuring that your toilet operates effectively for years to come.
